序
拟定了学习的计划,接下来就按照计划开始慢慢学习吧,之前将samples的文件树列出来,一看数量还真有点多到吓到芒果。不过既然选择做技术这一行也明白是要活到老学到老的。话不多说开始吧,首先就从简单的部分入手,本篇看看图像的线性混合的示例。
线性混合原理
此示例学习的是图像的线性混合,要学习的关键是对图像的线性混合。首先可以先理解一下线性这一概念。这里芒果推荐两个帮助理解线性的在线文献。
博文推荐阅读
由于图像线性混合例子的原理比较简单,也都比较好理解。但网上大多的博文也都是直接贴代码的实现,所以可以推荐的并不多。这里就贴上几篇篇解释相对多一点的博文吧。
原理小结
此示例的原理比较简单,掌握好只需要理解好线性这一概念,以及混合图像示例的一个混合公式。但线性的概念虽然常见,准确理解却不一定容易,芒果这里引用知乎的一个回答
1
2
3
|
"线性"="齐次性"+"可加性",
"齐次性"是指类似于: f(ax)=af(x),
"可加性"是指类似于: f(x+y)=f(x)+f(y),
|
这解释应该是比较准确,可以参考。假如觉得这么学术风格的理解不太易懂,参考另一个解释也可以
所以从这个解释可以知道,线性混合的原理公式不会包含二次的变量。本次的混合公式如下
1
2
|
g(x)=(1-a)f0(x)+af1(x)
g(x)=(1-a)f0(x)+af1(x) + gamma
|
所以从公式上理解就是,两张图片一一对应的两个像素的灰度值点分别乘上一个系数,相加,结果为新像素的灰度值。这一过程为线性混合。需要注意的两个点是,两个系数和为1,相加后的结果如果有需要可以再加一个gamma进行调整,这gamma主要是对混合后像素点亮度进行调整。
代码分析
流程步骤
示例代码两比较少,流程步骤也非常简单。所以从公式出发,简单说一下流程。
1. 获取公式中的系数
 1
 2
 3
 4
 5
 6
 7
 8
 9
10
|
  /// Ask the user enter alpha | ch: 要求用户输入 alpha
   cout << " Simple Linear Blender " << endl;
   cout << "-----------------------" << endl;
   cout << "* Enter alpha [0.0-1.0]: ";
   cin >> input;

   // We use the alpha provided by the user if it is between 0 and 1 | ch: 如果 alpha 介于0和1之间, 我们将使用用户提供的 alpha
   if( input >= 0 && input <= 1 )
     { alpha = input; }
|
2. 读取两张规格相同图片
1
2
3
4
5
|
//![load] | ch:加载
/// Read images ( both have to be of the same size and type ) | ch:读取图像 (两者的大小和类型相同)
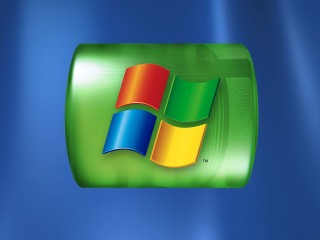
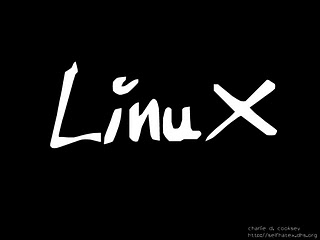
src1 = imread( "../data/LinuxLogo.jpg" );
src2 = imread( "../data/WindowsLogo.jpg" );
//![load]
|
3. 调用addWeighted函数进行混合操作
1
|
addWeighted( src1, alpha, src2, beta, 0.0, dst);
|
4. 显示混合结果
1
2
|
   imshow( "Linear Blend", dst );
   waitKey(0);
|
完整代码
 1
 2
 3
 4
 5
 6
 7
 8
 9
10
11
12
13
14
15
16
17
18
19
20
21
22
23
24
25
26
27
28
29
30
31
32
33
34
35
36
37
38
39
40
41
42
43
44
45
46
47
48
49
50
51
52
53
54
55
56
57
58
59
|
/**
 * @file AddingImages.cpp | ch:AddingImages.cpp 文件
 * @brief Simple linear blender ( dst = alpha*src1 + beta*src2 ) | ch:简单的线性混合(dst = alpha*src1 + beta*src2),括号中为混合的公式原理
 * @author OpenCV team | ch:作者 opencv团队
 */
#include "opencv2/imgcodecs.hpp"
#include "opencv2/highgui.hpp"
#include <iostream>

using namespace cv;

// we're NOT "using namespace std;" here, to avoid collisions between the beta variable and std::beta in c++17 | ch: 这里没有 "使用命名空间 std;", 以避免测试版变量和 std::beta之间的冲突,在c++17中
// 这是一种良好的编码习惯,为了避免命名空间的污染,避免变量之间的冲突,最好不要直接在程序开头使用using namespace std

using std::cin;
using std::cout;
using std::endl;

/**
 * @function main | ch:主函数
 * @brief Main function | ch:简短的主函数
 */
int main( void )
{
   double alpha = 0.5; double beta; double input;

   Mat src1, src2, dst;

   /// Ask the user enter alpha | ch: 要求用户输入 alpha
   cout << " Simple Linear Blender " << endl;
   cout << "-----------------------" << endl;
   cout << "* Enter alpha [0.0-1.0]: ";
   cin >> input;

   // We use the alpha provided by the user if it is between 0 and 1 | ch: 如果 alpha 介于0和1之间, 我们将使用用户提供的 alpha
   if( input >= 0 && input <= 1 )
     { alpha = input; }

   //![load] | ch:加载
   /// Read images ( both have to be of the same size and type ) | ch:读取图像 (两者的大小和类型相同)
   src1 = imread( "../data/LinuxLogo.jpg" );
   src2 = imread( "../data/WindowsLogo.jpg" );
   //![load]

   if( src1.empty() ) { cout << "Error loading src1" << endl; return -1; }
   if( src2.empty() ) { cout << "Error loading src2" << endl; return -1; }

   //![blend_images] | ch:混合图像
   beta = ( 1.0 - alpha );
   addWeighted( src1, alpha, src2, beta, 0.0, dst);
   //![blend_images]

   //![display] | ch:显示
   imshow( "Linear Blend", dst );
   waitKey(0);
   //![display]

   return 0;
}
|
关键函数
线性混合示例的关键函数为addWeighted,函数的原型为
 1
 2
 3
 4
 5
 6
 7
 8
 9
10
|
void cv::addWeighted	(	InputArray 	src1,
double 	alpha,
InputArray 	src2,
double 	beta,
double 	gamma,
OutputArray 	dst,
int 	dtype = -1
)
Python:
dst	=	cv.addWeighted(	src1, alpha, src2, beta, gamma[, dst[, dtype]]	)
|
参数解释
first input array.
second input array of the same size and channel number as src1. | 第二个输入数组(图像),其大小和和通道数量与src1相同
scalar added to each sum. | 标量,加到每个(像素点)总和
output array that has the same size and number of channels as the input arrays. | 输出数组(图像),其大小和通道数与输入数组相同
optional depth of the output array; when both input arrays have the same depth, dtype can be set to -1, which will be equivalent to src1.depth(). | 输出数组的可选深度;当两个输入数组具有相同的深度时,dtype可以设置为-1,这相当于src1.depth()。
python版本
 1
 2
 3
 4
 5
 6
 7
 8
 9
10
11
12
13
14
15
16
17
18
19
20
21
22
23
24
25
26
27
28
29
30
31
32
33
34
|
#/usr/bin/env python

"AddingImages-pyhton.py"
"author:mango"

import cv2 as  cv

if __name__ == "__main__":
    # 获取权重系数
    ipt = float(input("Enter alpha[0.0-1.0]"))
    alpha = 0.5
    if(ipt >= 0 and ipt <= 1):
        alpha = ipt

    # 读取两张规格相同图片
    src1 = cv.imread("LinuxLogo.jpg")
    src2 = cv.imread("WindowsLogo.jpg")

    if src1 is None:
        print("Error loading src1")
        exit(-1)

    if src2 is None:
        print("Error loading src2")
        exit(-1)
    # 调用addWeighted函数进行混合操作
    beta = 1.0 - alpha
    dst = cv.addWeighted(src1, alpha, src2, beta, 0.0)

    # 显示混合结果
    cv.imshow("Linear Blend", dst)
    cv.waitKey(0)

    cv.destroyAllWindows()
|
总结
先看一下程序的运行效果,首先看两张图片的原图
再看一下运行后的结果

可以看到对图片进行线性混合可以得到两张图片混合叠加在一起的效果。本次sample示例总结下来可以归结以下几个点
- 理解线性的概念
- 学习和掌握线性混合的公式
- 学习和掌握addWeighted函数的使用,各个参数的意义弄明白
尾巴
这是samples系列开始的第一篇,虽然是非常简单的线性混合示例,也没想象到写的篇幅也不算特别短。应了那句话,把简单的事情做好也不是一件容易的事,万事开头难,且行且努力吧。
本文由芒果浩明发布,转载需注明来源。
本文链接:https://blog.mangoeffect.net/opencv/opencv-sample4-AddingImages.html